
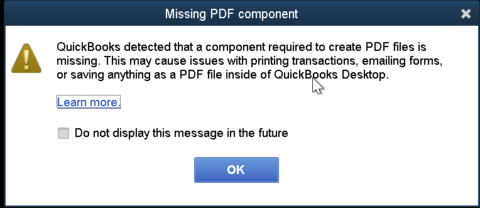
QuickBooks helps users view their reports in different formats, including the PDF format. During the conversion of any document in QuickBooks to PDF format, or while viewing the PDF file created in QuickBooks, users may come across the QuickBooks missing PDF Component error. The error appears as “QuickBooks detected that a component required to create pdf files is missing.” Know more by reading this comprehensive blog and also master the skill of troubleshooting it.
What leads to QuickBooks Missing PDF Component Error
The error can be evoked by:
- System drivers not updated
- Some problems in the Adobe Reader.
- Windows O/S is facing some corruption
- Disabled Microsoft XPS Document Writer.
- Not upgrading QuickBooks Desktop.
Signs that indicate QuickBooks Component Error
This error has certain signs that can provide indication of its arrival. These are:
- Not able to print PDF documents from QuickBooks.
- Repeated glitches and crashes.
- PDF files not opening
- Running QuickBooks Desktop lags the system
- Any operations with PDF files results in system lags
Solutions to Rectify QuickBooks Missing PDF Component Error
Implement the following solutions to get this PDF error fixed from your system
Solution 1: Update QuickBooks Desktop
- Just run QuickBooks as you generally do, and after that, go to the Help tab.
- From there, choose Update QuickBooks desktop and click on the box besides Reset Updates.
- Now, start with update by clicking on Get Updates.

- As the process finishes, run QuickBooks and start with the installation of the update.
- Give another try to opening or printing of the PDF file
Solution 2: Configure Microsoft XPS Document Writer v4.
The process to set up the XPS Document Writer v4 is:
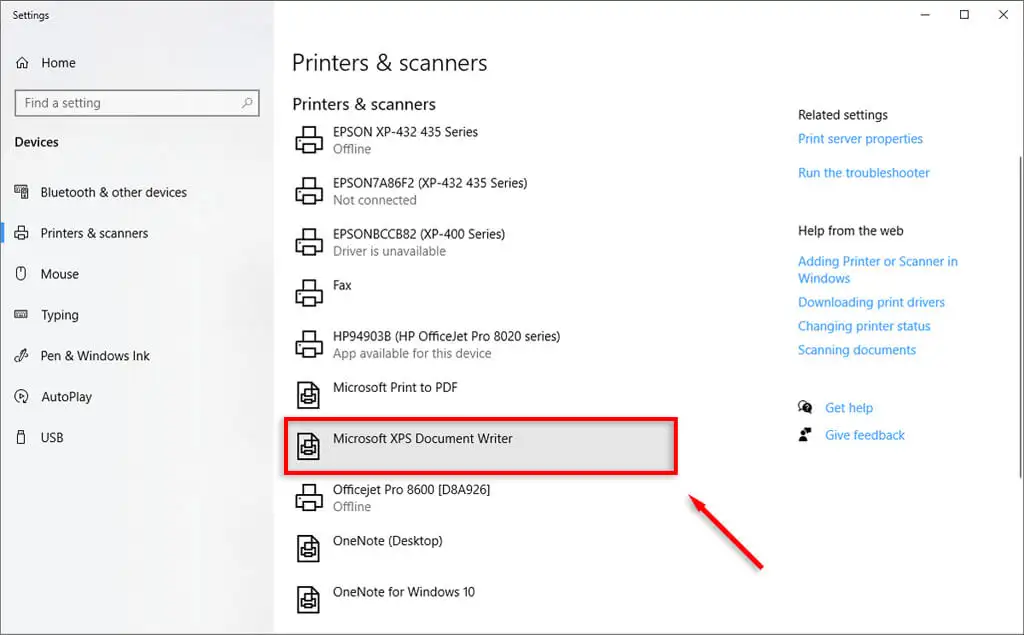
- From Start, advance to Settings, and then go to Bluetooth and devices option.
- Now, switch to Printers and Scanners, and then add a printer or scanner.
- Add a local printer or network print with the manual settings.
- Choose PORTPROMPT: (Local port) and then tap on Next in the Use an existing port.
- Opt for Microsoft from the manufacturer list.
- Then, click on Microsoft XPS Document Writer v4 and go with Next.
- Click on the option to Replace the current driver, and then tap on Next.
- Dissociate “v4” from the Microsoft XPS Document Writer name in the printer name field.
- Once done, click on Finish.
- Make sure to unmark the box beside Make XPS the default printer.
Solution 3: Turn on MS XPS Document Writer
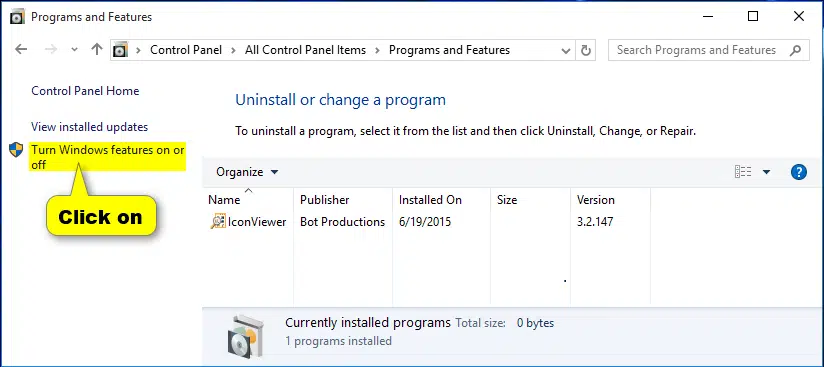
- Open Control Panel, followed by going to Programs and Features tab.
- Now, advance to Turn Windows features on or off.
- Choose Enable MS XPS Writer.
In the present discussion, an attempt was made to highlight the methods that can assist in resolving QuickBooks Missing PDF Component error. If you have queries to share with us, just call our experts at 1-800-761-1787.